
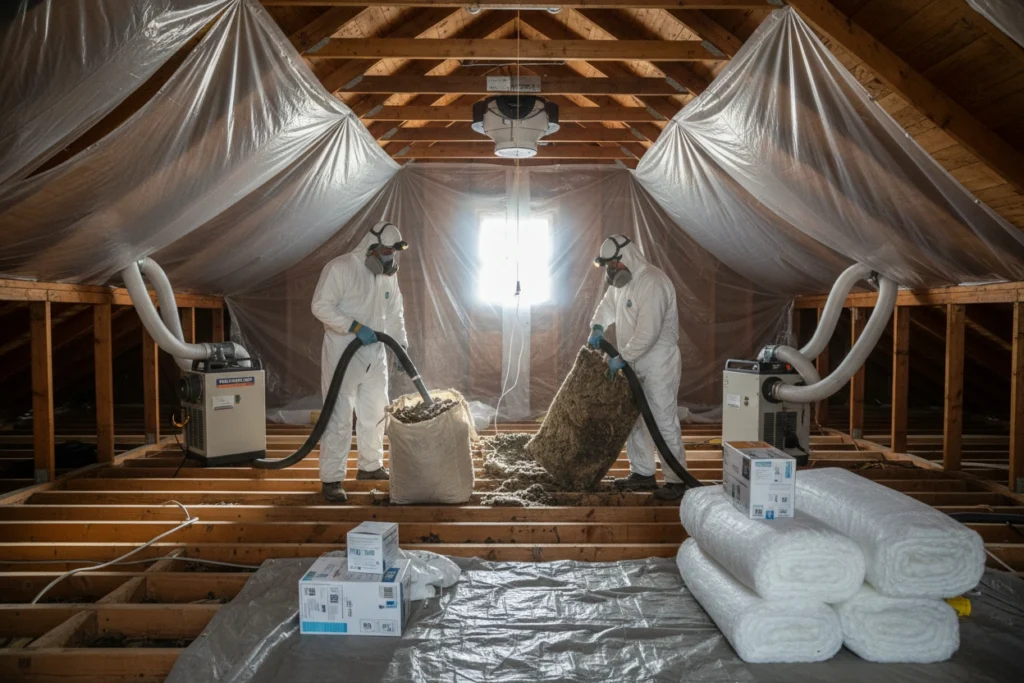
Restoring your attic after a rodent infestation means tackling far more than visible droppings. You’ll need to remove all contaminated insulation, sanitize exposed surfaces with EPA-registered disinfectants, seal every entry point rodents used to get in, and install fresh insulation that restores your attic’s thermal performance. The full process typically takes three to seven days and costs between $1,500 and $15,000—and every phase matters more than most homeowners expect.
Key Takeaways
-
A thorough inspection identifies droppings, structural damage, entry points, and infestation extent before any restoration work begins.
-
Full insulation removal is necessary since rodent urine, feces, and pheromones cannot be eliminated through cleaning alone.
-
EPA-registered disinfectants are applied to all contaminated surfaces, with PPE required and debris sealed in plastic bags.
-
Entry points are sealed using copper mesh and expanding foam, with sealed areas rechecked 30 days after treatment.
-
Total restoration costs range from $1,500 to $15,000 and typically span three to seven days from start to finish.
How Bad Is the Damage? Assessing What Rodents Left Behind
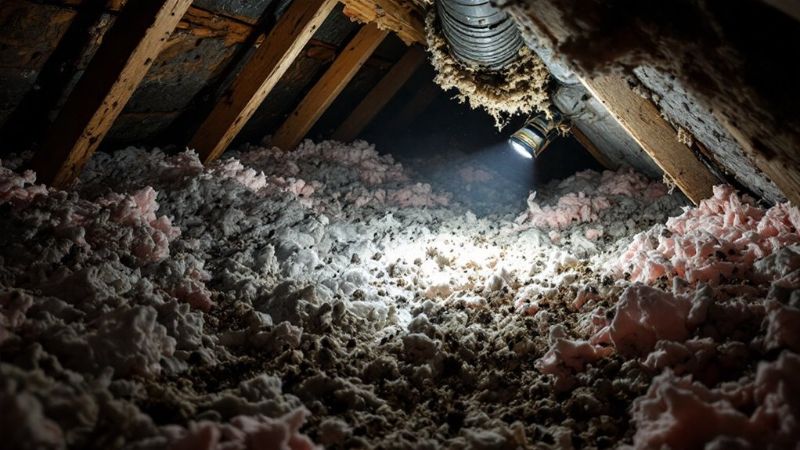
Before you can restore your attic, you need to know exactly what you’re dealing with. A thorough assessment covers four key areas: contamination, insulation, structure, and entry points.
Start by documenting rodent droppings and urine staining. Their distribution tells you how active the infestation was and which zones require the most intensive decontamination.
Next, inspect your insulation. Rodents burrow through it, compress it, and saturate it with waste, destroying its thermal performance.
Then check for structural damage. Gnawed joists, damaged wiring, and compromised vapor barriers are common findings that affect both safety and building integrity.
Finally, locate every entry point rodents used to access the space. This assessment isn’t optional — it determines the full scope of work and prevents you from missing critical damage during restoration. Additionally, look for signs of rodent activity that can indicate the extent of the infestation.
Why the Old Insulation Has to Go
Once rodents have colonized your attic, the insulation doesn’t just look dirty—it’s compromised at a structural and biological level.
Urine soaks deep into fibers, feces embed throughout the material, and pathogens penetrate well beyond what any surface cleaning can reach, making remediation of the existing insulation impossible. Compounding this, compressed and saturated insulation loses its thermal resistance, and hidden nesting materials woven into the batts or blown-in fill create ongoing contamination risks that remain until you remove everything entirely. Additionally, rising energy bills may indicate R-value degradation from rodent damage, further emphasizing the need for complete replacement.
Contamination Beyond Surface Level
When rodents nest in attic insulation, the damage goes far deeper than what’s visible on the surface. Urine saturates insulation fibers, penetrating multiple layers and reaching the subfloor.
Feces accumulate throughout nesting zones, embedding pathogens deep within the material. Standard cleaning can’t address this level of contamination.
The health risks associated with compromised insulation are serious. Hantavirus, leptospirosis, and salmonella can persist in dried waste long after the rodents are gone.
Disturbing contaminated insulation without proper containment releases airborne particles directly into your breathing space.
The long term effects of leaving this material in place compound over time. Moisture retention from urine degrades structural components, and residual pheromones attract new rodents.
Full insulation removal is the only way to eliminate these hazards completely.
Insulation Loses Its Effectiveness
Rodent activity doesn’t just contaminate insulation—it destroys its functional integrity.
Both insulation types commonly found in attics—blown-in cellulose and fiberglass batts—rely on consistent loft and density to trap air and maintain thermal resistance. When rodents nest, burrow, and compress insulation, they eliminate the air pockets that make it effective.
The key effectiveness factors here are R-value and structural uniformity. Rodent tunneling collapses material, reducing R-value considerably in localized zones.
Urine saturation causes cellulose to clump and fiberglass to mat, both of which accelerate thermal loss. Even sections that appear undisturbed may carry moisture damage or compaction beneath the surface.
You can’t restore these properties by drying or fluffing compromised material. Full removal is the only way to reestablish a functional thermal barrier.
Hidden Nesting Materials Remain
Even after pest removal is complete, the attic still holds a layer of embedded risk: nesting materials rodents pack into insulation don’t leave with the animals.
Nesting behaviors drive rodents to shred insulation fibers, compress fill layers, and weave in organic debris—leaves, fabric scraps, and dried feces—creating hidden hazards that persist long after the infestation ends.
These materials carry pathogens, parasites, and pheromone trails that attract future infestations. You can’t extract them selectively. They’re distributed throughout the insulation matrix, not concentrated in one spot.
Attempting to remove only the visible nests leaves contaminated material behind.
Full insulation removal is the only method that eliminates these hidden hazards completely.
Partial remediation extends your exposure risk and leaves the attic structurally vulnerable to re-infestation.
Sanitizing the Attic After a Rodent Infestation
Once the rodents and their entry points have been addressed, sanitizing the attic becomes the next critical step.
You’ll need to apply an enzyme-based disinfectant to all contaminated surfaces before removing rodent droppings, urine stains, and soiled insulation. Never dry-sweep—this aerosolizes pathogens like Hantavirus. Instead, use an EPA-registered disinfectant, saturate affected areas, and allow adequate dwell time before extraction.
Proper sanitation techniques require full personal protective equipment: an N95 respirator, disposable gloves, and a Tyvek suit. Additionally, be sure to report specific questions about rodent-borne diseases to your local health department to ensure thorough safety.
Bag all contaminated debris in sealed, heavy-duty plastic and dispose of it according to local regulations.
Once surface decontamination is complete, treat structural wood and remaining surfaces with an antimicrobial fogger. This eliminates residual bacteria, neutralizes odors, and prepares the attic for insulation replacement.
Replacing Insulation: What Type Actually Works Best
After sanitizing the attic, selecting the right insulation replacement is critical—not all insulation types perform equally well in post-infestation environments.
You’ll typically choose between two primary options: fiberglass insulation and cellulose insulation.
Fiberglass insulation resists moisture, doesn’t support mold growth, and won’t attract rodents since it offers no organic material for nesting. It’s the more hygienic choice following contamination removal. Additionally, pest-resistant insulation can significantly enhance your home’s defense against future infestations.
Cellulose insulation, while eco-friendly and thermally efficient, is made from recycled organic material—making it more susceptible to moisture retention and potential re-infestation if entry points aren’t fully sealed first.
For post-infestation attics, fiberglass batt or blown-in fiberglass is generally the stronger recommendation. Prioritize R-value appropriate for Portland’s climate zone and guarantee complete coverage to eliminate thermal gaps.
Sealing Entry Points So Rodents Can’t Return
Replacing insulation means nothing if rodents can still find their way back in. Entry point identification comes first — you’ll need to inspect every potential gap before applying any sealing techniques.
Focus your inspection and sealing efforts on these four areas:
-
Roofline gaps and fascia boards — seal with galvanized flashing or caulk rated for exterior use.
-
Soffit vents — cover with 16-gauge steel mesh, not plastic screening.
-
Pipe and conduit penetrations — pack with copper mesh, then seal with expanding foam.
-
Foundation-to-wall connections — use concrete patching compound for gaps exceeding ¼ inch.
Steel wool compresses over time and degrades — avoid it.
Every sealed point should be checked 30 days post-treatment to confirm integrity holds against persistent gnawing attempts. Implementing proper entry point identification is essential to preventing future infestations.
What Attic Restoration Costs and How Long It Takes
Attic restoration costs typically range from $1,500 to $15,000, depending on the extent of contamination, the size of the space, and the materials requiring replacement.
You can expect a straightforward insulation swap-out to take one to two days, while severe infestations involving structural repairs, full insulation removal, and sanitization can stretch the timeline to a week or more.
Getting a detailed inspection upfront lets you nail down an accurate scope of work and avoid cost surprises mid-project. Additionally, it is crucial to ensure all rodents are trapped before commencing any cleanup to prevent further issues.
Typical Cost Ranges
Restoration costs vary across four main factors: the size of your attic, the severity of the contamination, the extent of insulation damage, and whether structural repairs are needed.
These cost factors combine differently in every job, making exact quotes impossible without an inspection.
Typical ranges break down as follows:
-
Insulation removal and disposal: $1–$2 per square foot, depending on insulation types (blown-in, batt, or spray foam)
-
Sanitization and decontamination: $500–$1,500 for most residential attics
-
New insulation installation: $1.50–$3.50 per square foot based on material and R-value requirements
-
Structural repairs (framing, sheathing, vapor barriers): $300–$2,000+ depending on damage severity
Most homeowners spend between $1,500 and $6,000 total, though heavily contaminated or large attics can exceed that range.
Average Project Timelines
Beyond cost, timeline is the other major variable homeowners want pinned down before committing to a restoration project. Most attic restorations span three to seven days, though complex infestations can stretch two to three weeks.
The project phases typically sequence as follows: inspection and assessment (one to two days), insulation removal (one day), sanitization and deodorization (one day), structural repairs if needed (one to three days), and insulation reinstallation (one to two days).
Several timeline factors can extend that schedule — attic size, severity of contamination, structural damage discovered during removal, and material availability. Permit requirements occasionally add days as well.
You should request a phase-by-phase schedule from your contractor before work begins. That document lets you track progress and identify delays before they compound.
Frequently Asked Questions
Is Attic Restoration Covered by Homeowners Insurance After Rodent Damage?
Your homeowners insurance policy typically won’t cover rodent damage, as most insurers classify it as preventable. You’ll need a professional damage assessment to document losses and explore any available coverage exceptions.
Can I Stay Home During the Attic Restoration Process?
You can typically stay home during attic restoration, but you’ll encounter significant noise concerns from equipment and debris removal. Your technician will advise you on any home safety precautions specific to your situation.
Do I Need Permits for Attic Insulation Replacement in Portland?
You typically don’t need permits for attic insulation replacement under Portland regulations, but if structural changes are involved, you’ll want to verify with the city. We’ll handle managing any local compliance requirements for you.
How Do I Know if Rodents Have Reached Other Areas Beyond the Attic?
Check walls, crawl spaces, and cabinets for rodent signs like droppings, gnaw marks, or grease trails. You’ll want a professional inspection to confirm spread and establish pest prevention measures throughout your entire home systematically.
Will Restoration Eliminate the Urine Smell Coming Into My Living Space?
Yes, restoration techniques effectively eliminate urine odor by removing contaminated insulation, applying enzyme-based neutralizers, and sealing affected surfaces. You’ll notice a significant reduction in smell once the treatment fully penetrates and breaks down the odor-causing compounds.
Conclusion
Attic restoration isn’t a single task — it’s a structured sequence of steps that each build on the last. Skip the assessment and you’ll miss hidden damage. Skip the sanitization and you’re leaving pathogens behind. Skip the sealing and rodents will return. When you follow the process correctly — inspect, remove, sanitize, reinstall, seal — you’re not just restoring insulation. You’re restoring the structural integrity and safety of your entire home.